How to output 240p from a Raspberry Pi
The Raspberry Pi is capable of outputting 240p analogue video, through it's headphone jack of all things. This means that the Pi can be one of the easiest ways to play old games on a real CRT television.
This is a project I did almost 5 years ago. Later I wiped the SD card I was using when I became interested in trying out other Raspberry Pi projects. However today I'm doing it again, just to demonstrate how it was possible before this obscure bit of knowledge becomes lost.
You will need:
- A Raspberry Pi, charger, game controller, and Micro SD card. (For this project I'll be using a Pi 3B.)
- A computer capable of reading a Micro SD card. (There are adapters for this)
- RCA to 3.5mm adapter cable. Make sure the 3.5mm side has 3 rings, and the RCA side has a red, white, and yellow plug.
- A CRT television. (check your local thrift stores)
Download the latest version of RetroPie (v4.8 at the time of writing this), and flash it to your Micro SD card. When that's finished, open config.txt (Windows can see the boot partition where config.txt is located, but not the rest of the card.) and add the following lines:
sdtv_mode=16
disable_overscan=1
This will force 240p, even in the menus. You might want to change it to sdtv_mode=0 first to make the text readable while you set things up. Or set up the Pi normally for an LCD monitor, then "convert" it later to output analog. (Alternatively, maybe something like this will work better for you, I haven't yet tested this method.)
If you live outside the North American NTSC region your sdtv_mode will be something different, probably sdtv_mode=18 for PAL. On a Pi 4 you will also have to add the line enable_tvout=1, since CRT compatibility apparently affects the clock speed.
Plug the Raspberry Pi into the TV using the RCA to 3.5mm adapter cable and turn it on. Plug in an ethernet cable or set up Wi-Fi. Navigate to RetroPie > ES Themes and install a CRT-friendly theme like tft, picade, or any of the ones with "240" in the name.
Next, add some roms. (I enabled SSH and used WinSCP) The folder to put them in is /home/pi/RetroPie/roms/.
Now you can try running a game. Although the TV is seeing 240p, emulators will run at 2x scale internally. This is to our benefit, because not all consoles had the same horizontal resolution. Displaying at 2x scale allows us to stretch or squash the image until it looks right on the screen. (Horizontally wide pixels are accurate to what consoles actually outputted.) The vertical resolution should be pixel-perfect however, it can be hard to tell on a blurry crt, but the RetroArch menu (hotkey + X while a game is running) has a grid background you can use to confirm.
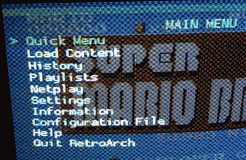
Because our pixels don't exactly match the horizontal resolution, scrolling will look uneven. To fix this, open the RetroArch quick menu, and apply the sharp-bilinear shader preset. (tvout-tweaks should also look good, but I didn't see it installed by default.) If the picture is vertically uneven or too wide, navigate to settings > video > scaling and play with the options there.
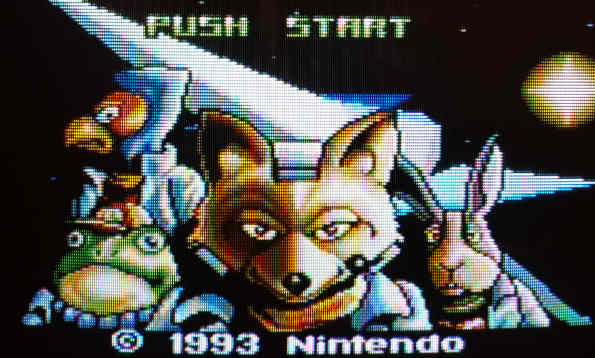
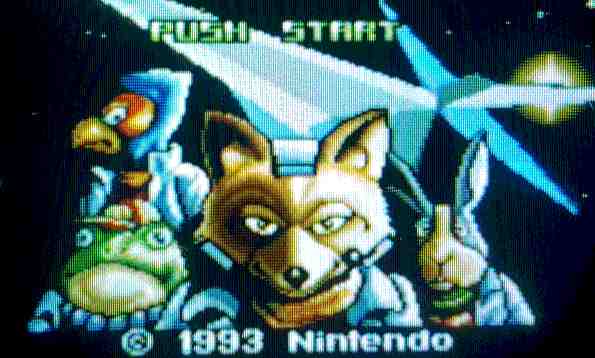
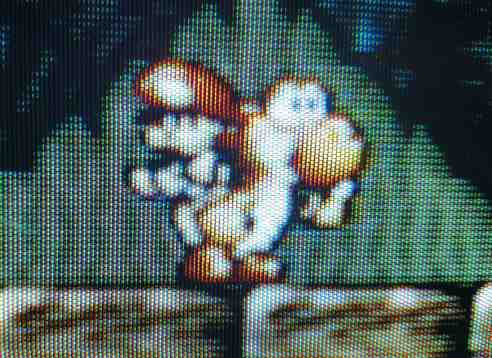
Star Fox on a Sony Trinitron
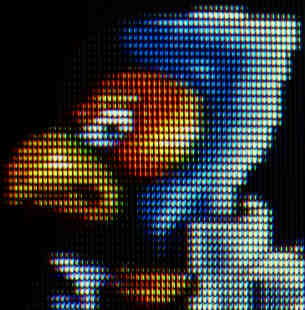
A blurry Toshiba that gave everything depressing colors. I think it looks neat.
Special thanks to Filthy Pants: A Computer Blog, which originally inspired this project.